Benjamin Franklin, in poor Richards’s Almanack, in 1741, wrote “Beauty, like supreme dominion is but supported by opinion”. A later idiom “ Beauty is in the eyes of the beholder” was coined and accredited to Margaret Wolfe in the book Molly Brown in 1878.
Landscape design is the orderly placement of plants and structures in a natural environment to cause the viewer to “feel better”.
I have been involved in the landscape profession for 45 years and have drawn my share of landscape designs. Drawing landscape designs can be challenging and elusive because we are trying to create a plan or road map on paper to construct something of beauty and at the same time be useful. A beautiful landscape is the product of a drawing on a piece of paper, but most clients don’t realize the effort and time spent in the design process. My heart bleeds for that landscaper that has put time into a landscape design for a homeowner or builder and does not get the job. Some home builders are known to play musical chairs with landscapers. Home builders are concerned more about the bottom line regardless of the beauty and function of the landscape.
The following article is addressed to landscapers and homeowners to help them design landscape plans more efficiently. Let’s leave the more elaborate designs to the landscape architects.
Basically, you will have 2 types of clients, (1) homeowners and (2) builders. The following are steps to be followed to produce the final design.
STEPS TO FOLLOW
First impression is a lasting impression. The first visit with most prospective clients is at their home. The designer has to sell him or herself and then the landscape design. It is best to wear clean professional clothes denoting that you are a professional. The client usually invites you into their home to sit at the dining room table. Show the client pictures of some of you best jobs. A nice warm visit breaks the ice and should lead the client to express what they would like have done in their yard. This conversation leads to a need for a landscape design, and the rates the designer charges are conveyed to the client. There should never be a free landscape design. If the client is agreeable with your terms, a stroll around the site will allow the client to mention what landscaping they would like to have done. This is the time to let the client do the talking and the designer take notes. At this point the designer should have a rough idea what the total cost of the finish job should be. The designer should inquire “how much are you willing to spend on the project”? If the client is not willing to spend money for the total job, maybe the job can be divided in several phases, front yard this year, side yards next year and the backyard the third year. Not all is lost.
The second visit is for a site inventory for a base map. This includes information on property lines, utilities, house footprint with windows, roof overhangs, and location of any structures. The client is responsible for furnishing a copy of the plat on the lot. The base map contains the information for the complete landscape design.
Third visit is to deliver and explain the finished landscape design. The design processes will be covered in future articles.
The following is a technique I’ve used for several years in locating trees, plant beds, driveways, sidewalks and outdoor structures. I call this the X Y Grid System
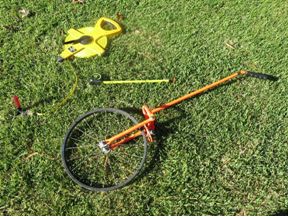 The tools needed are a 200 ft. roll up tape with screw driver, a yard measuring wheel, and/or a 30 ft. metal tape
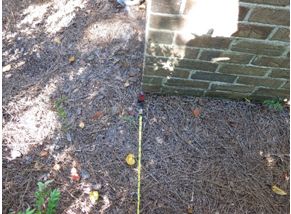
Insert screwdriver through end of dummy end of tape. Pull out desired length and align tape with sidewall of home with numbers up. This is the X line or center line beginning at the front left corner of house.
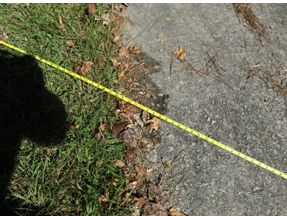
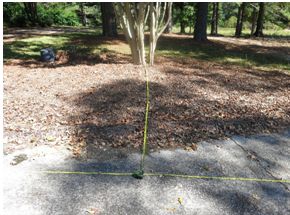
Driveways and sidewalks may be located. This is the center line (X line) reading 36 ft. x 0 ft. at edge of concrete drive.
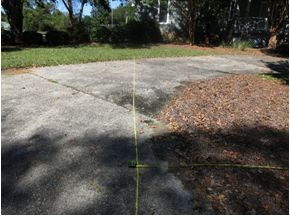
Measure perpendicular distance Y of tree to X line (center line) and record. Record distance on X line (center line). The reading is 60 ft. x 13 ft. Since the tree is to the right of the X line (center line) the reading would be Front Left Corner Right 60 ft. x 13 ft. or FLCR 60 x 13 multi 18” dia. (diameter) crape myrtle as shown below.
FLCR 60 x 13 multi 18” dia. multi crape myrtle
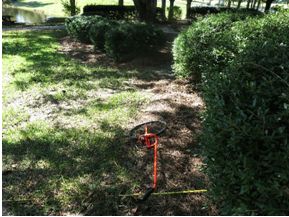
This is a Bradford tree, trunk barely visible on the left of X line (center line) with a reading of Front Left Corner Left 16 ft. X 22 ft. or FLCL 16 X 22 Bradford pear 24’’ dia.
The above coordinates may be plotted on the base map once the foundation of the house has been drawn. This is the first article in a series of articles on “Landscape Design Made Easy”
 This article has been written by Ron Cowart, Landscape Consulting, 1117 Flaming A rrow Rd., Elgin SC, and may be reached at cowartconsulting@gmail.com.

